Thursday, December 28, 2006
Pictures and tips from the Dart buildup
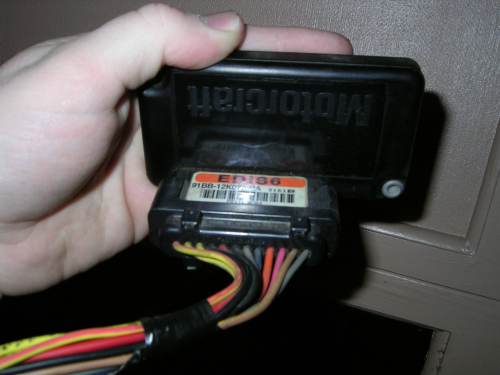 Went to Pull-A-Part today. I brought back a Ford EDIS-6 ignition controller. The cashier couldn't figure out exactly what category this thing fell into, and as it's not much larger than a pack of cards, decided to only charge me about $5. For a six cylinder version, look for a '90 or later Aerostar; you'll find it on the passenger side inner front fender if a fellow scavenger hasn't already taken it.
This handy little module is one of the simpler ways to set up a distributorless ignition with Megasquirt. You'll need a module, a trigger wheel with its sensor, a coil pack, the associated wiring connectors, and the Megasquirt. You can use a Megasquirt-I with a few mods, or Megasquirt-II with hardly any changes at all. When you're using EDIS, you absolutely must use a 36 toothed crank wheel with one tooth missing - this requirement is hardwired into the EDIS module.
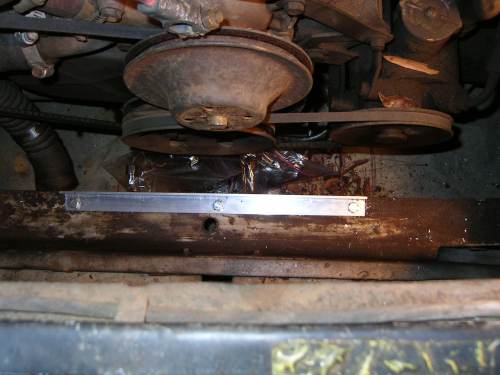 I've been making some progress on the radiator brackets for the Dart. Griffin didn't supply brackets with it, and the Summit brackets, in unmodified form, don't look like they were designed for a Mopar A-body. After all, this radiator was mostly meant for low buck circle track racers and not street cars. The lower mount is simply a piece of 1" angle alumium about 1/8" thick, held in place by three bolts. I added a foam rubber neoprene strip to the raised edge, too. I located it by putting the radiator in place and tracing its lower edge with an industrial-type crayon. Pretty simple but effective.
 I'm using the Summit brackets to anchor it on the top side. Only I've made a few changes to them by drilling out the bottom and bolting on some simple L-brackets from Ace Hardware. I'm using U-nuts on the radiator support to hold it in place so that I'll be able to unbolt the radiator without taking the grille off to hold the nuts from the other side. In this picture, I'm just test fitting it, so not all the bolts are fully tightened and not all the U-nuts are in place. Once I get the slots cut for all the U-nuts, the only brackets left will be the ones for the intercooler.
I think I know how I'll set that one up now, too, after a bit of test fitting. I plan to take a larger piece of angle aluminum, maybe 3" or so on each side, and run it across the radiator support out in front. This will support the intercooler from below - I may duplicate this for the top support, or I may use a simpler system up there as the lower bracket will take most of the weight. Ace Hardware doesn't carry angle aluminum that big, but I know I can get it from McMaster-Carr. Industrial supply houses have a lot of potential speed parts if you know where to look.
Labels: Dodge Dart
![]()

